CentOS, Ansible, HCL One Touch and Domino 12FP2 – MyDataSys
TL:DR – HCL Notes and Domino is a powerful and versatile platform that continues to be widely used today. It offers a range of features and functionality that make it well-suited for a variety of business needs.

HCL Domino serves as a valuable data source for extracting critical business insights, making it a cornerstone of our product portfolio.
While an ideal scenario would involve a preconfigured, secure Domino environment, the reality often differs. Our expert services empower organizations to bridge this gap and achieve a seamless integration with Elasticsearch and Kibana.
To ensure data integrity and minimize disruption, our preferred approach is to establish a new Domino environment that undergoes thorough cross-certification with the existing system. This enables secure data extraction without compromising the integrity of the existing setup.
Leveraging Proxmox VE, we efficiently host our target instances of Domino systems on Red Hat Enterprise 9 and CentOS Stream environments. This HCL-endorsed environment enables us to maintain a remarkably compact footprint for Domino systems. Our systems demonstrate exceptional resource efficiency, operating smoothly with as little as 1GB of memory. During installation, we allocate a minimal 20GB partition and subsequently expand storage capacity as needed using Proxmox’s flexible VM management capabilities. To streamline data management, we employ Linux symlinks to seamlessly integrate the Data directory within the Domino environment for secure, scalable and efficient data storage.
Our target systems are meticulously crafted within a dedicated development Proxmox environment, ensuring each instance is tailored to specific requirements. Upon completion, we safeguard the meticulously configured instance by creating an offline backup to a shared storage unit accessible by both our production and development environments. The carefully crafted instance is then swiftly restored to our production Proxmox cluster, seamlessly transitioning it to a live production environment within minutes. This streamlined process, powered by Ansible’s automation capabilities, is a testament to our commitment to efficiency and innovation. We take immense pride in the level of automation we have achieved.
So what does this look like?
The Centos Stream Instance.
IBM has the reverse Midas touch and there is no better example than Red Hat. There is always been a community version of the Red Hat distribution called CentOS but due to IBM’s (greed) business objectives CentOS is no longer being updated.
There are still a number of other Linux distributions that are compatible with HCL Domino, including Red Hat Enterprise Linux, Rocky Linux, and AlmaLinux. These distributions are all supported by their respective communities, and they are likely to continue to be developed and updated for many years to come.
In the meantime, you can continue to use your CentOS Stream instance with confidence. Domino simply uses the operating system as a base, and it does not require any specific features or functionality that is not available in CentOS Stream.
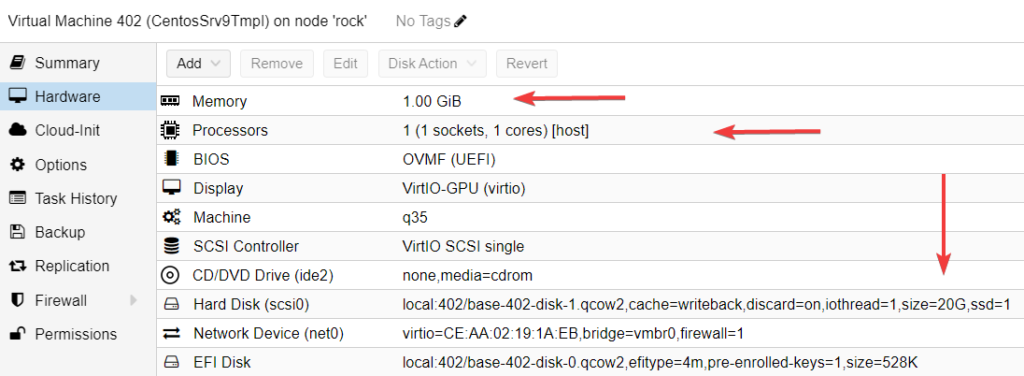
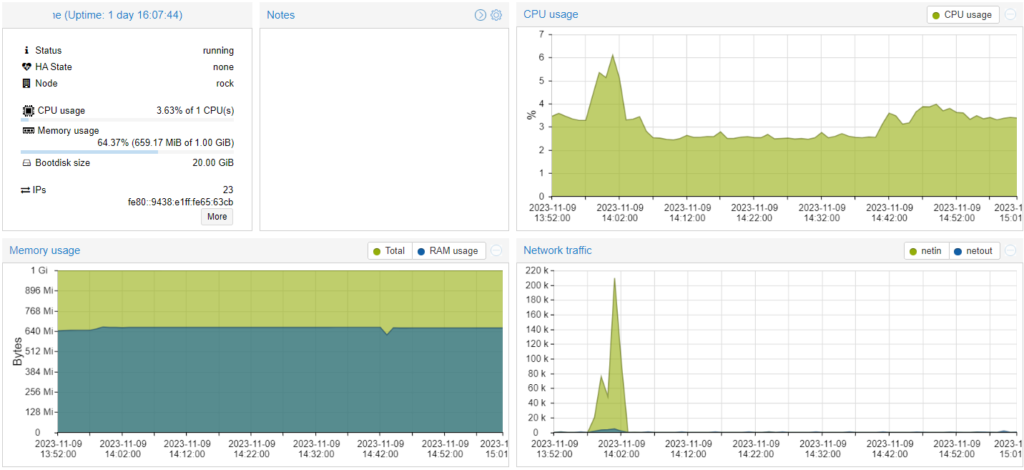
As you can see the allocated memory is 1GB with a 20GB disk. This is more than enough for a simple Domino system on Linux which is amazing. The instance has been secured and customised for our usage.
This server has been setup as a Template in Proxmox and simply needs to be cloned.
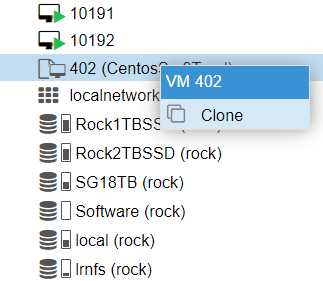
The cloning process takes less than a minute and and once complete you can start your new instance of CentOS Stream. Once started you can sign on as root with your designated password and check the IP Address using ip a. The next step is to create a static DHCP lease for the servers MAC address. This is not required but is part of our management process. The hostname can also be set in the router and will be sent via the DHCP protocol. As we need to run a few commands it is easier and more efficient to access the new instance via a PuTTY shell that will accept copy and paste. Our preference is MTPutty as we need to sign on with both “sysadm”, and later “notes” user accounts.
Customising and installing Domino via Ansible
Ansible from Red Hat is a powerful automation platform driven via YAML files. Using Ansible ensures consistency, repeatability and efficiency. It also allows us to distribute the task to engineers that may not have an in-depth knowledge of Linux and Domino on Linux.
We use best practice techniques to ensure consistency and compliance.
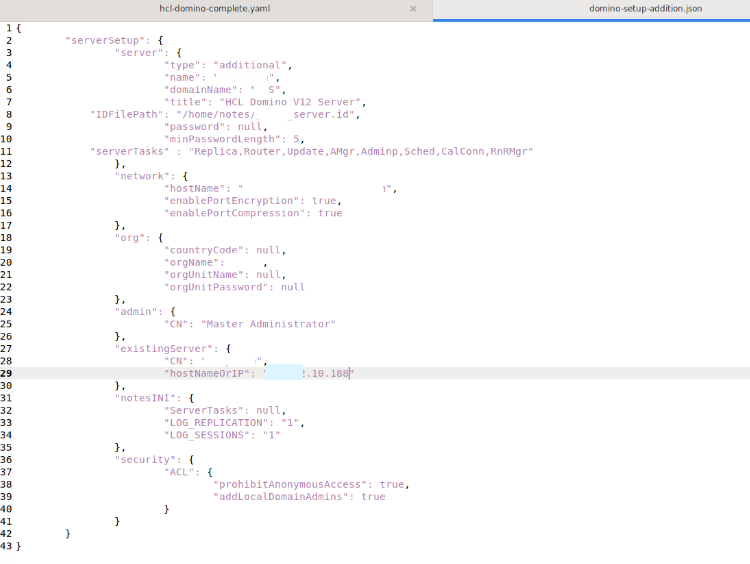
This is what our HCL-Domino-Complete playbook file looks like.
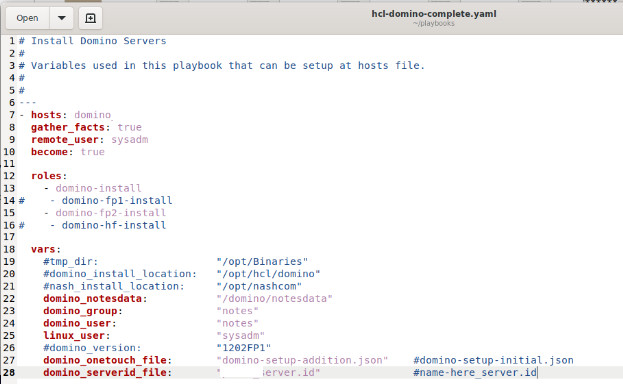
In Roles we define the various Domino install processes:

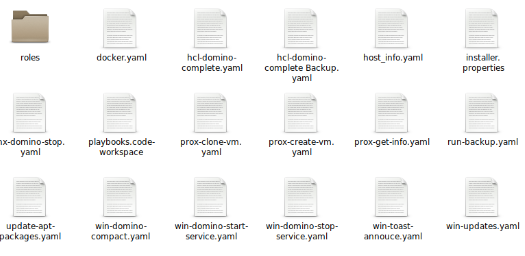
In our Tasks folder we have the various sub tasks listed.
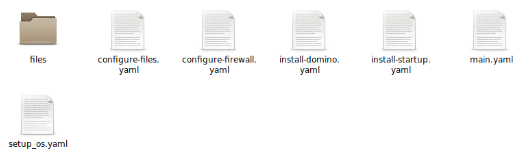
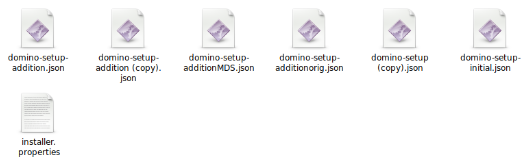
Our Files folder contains the key Domino JSON files required for the one-touch install.
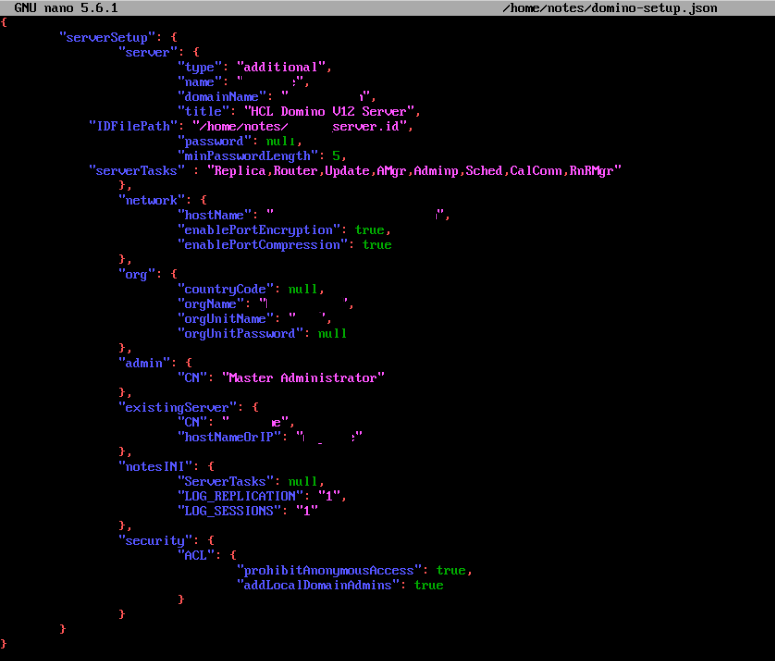
Here is a redacted example of an additional Domino server install one-touch setup file.
The next step is to run this command from the Ansible host.
ansible-playbook /playbooks/hcl-domino-complete.yaml -i ./inventory/hosts -K --ask-pass If all prerequisites have been met, and the variables were correct, and the source Domino server is accessible then the Ansible script file will run as follows.
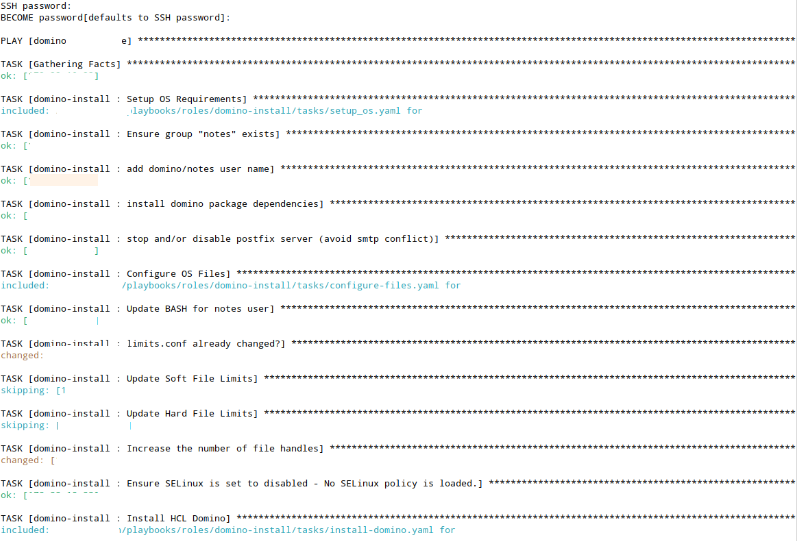
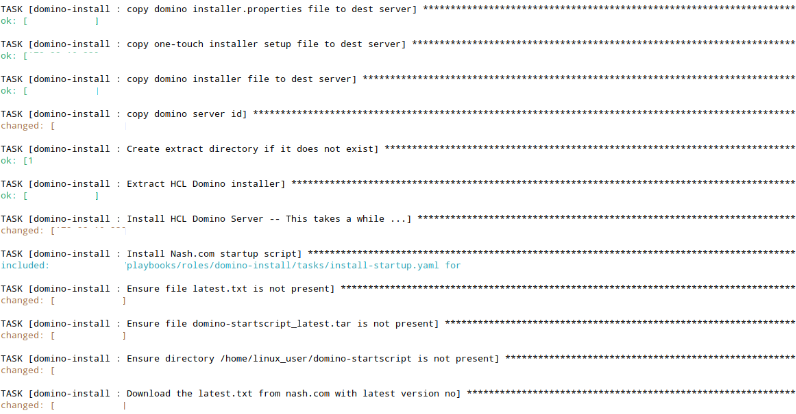
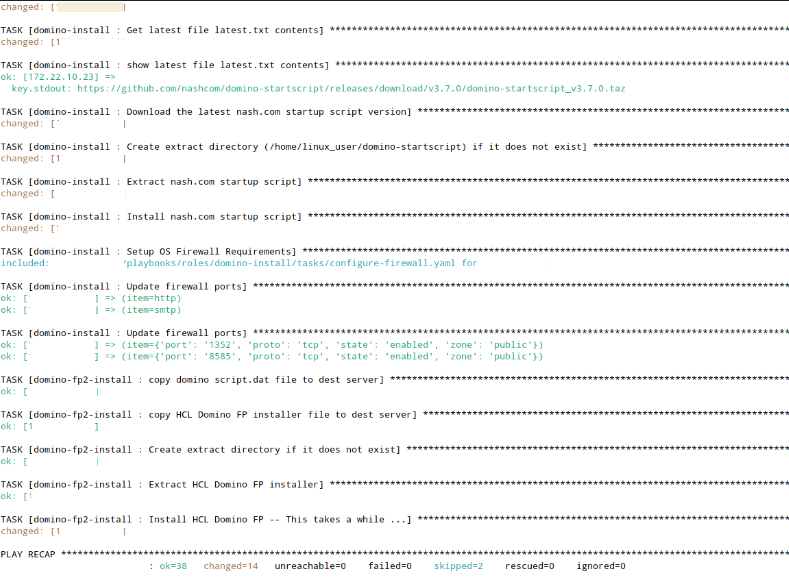
Return code 0! All good. The full install took less than 10 minutes to the new CentOS instance on a lab environment server. Your milage may vary (YMMV).
Configuring your new Domino instance.
This is a critical part of the Domino installation. At this stage there is no names.nsf, etc. Start by executing the following command using the notes user account in /local/notesdata
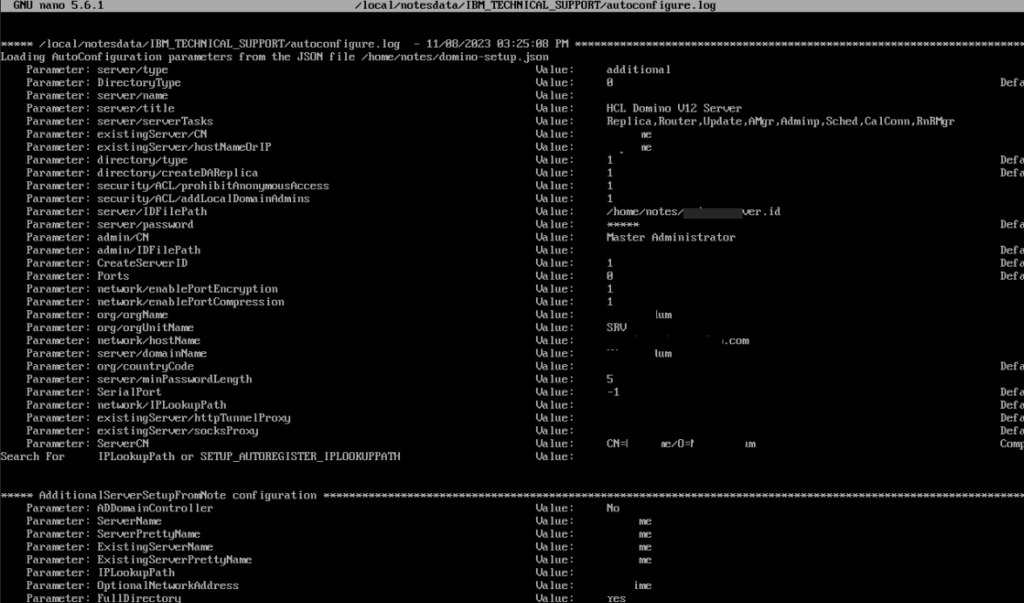
/opt/hcl/domino/bin/server -autoconf /home/notes/domino-setup.jsonThis file was created by Ansible during the installation and is now in the target system in /home/notes/domino-setup.json
In this partly redacted log file, you can see the variables being picked up by the one-touch installer via the domino-setup.json.
If everything was configured correctly the script file will execute without any issues and have a return code of 0!
Courtesy of Daniel Nashed, the most important MVP (The Grand Poobah) in the Lotus community we have access to an amazing start-up script without with it would be very tedious and frustrating. Thank you Daniel!!! Also, thank you to the extended team that setup the Ansible environment, you know who you are!

So you may ask, how do I start and stop the Domino server. I am glad you asked! Start a terminal session or an SSH session or a puTTY session and sign in with sysadm and use sudo -i for a superuser session. This is only required if you want to see the and interact with the Domino console.
domino start live
domino stop live
or:
domino status
domino start
domino stop
domino quit
domino restart
domino version
And that is it! Domino will be running and accessible. If not, give us a call for a quick quote and we can assist!
This a screenshot of the newly created server, running under Proxmox.
And in Domino Administrator

Please do contact us if you need any assistance with Proxmox, Ansible or Domino!