Step 3. Setting up Proxmox Mail Gateway.
TL:DR – Proxmox can be used in the perimeter network to send secure mail to downstream mail severs and can provide virus checking and rules based services. It will use Postfix as the MTA. It’s free.
Proxmox Mail Gateway or PMG is a comprehensive Open Source email security platform that provides useful web interface to a sophisticated mail solution. Under the covers it use Postfix and a bit of Sendmail for various MTA tasks. It adds a number of features but also adds quite a bit of complexity for those not aware of what mail servers do. It will be rare for you to find a PMG specific article describing how to fix a Postfix / Sendmail configuration issue or how to setup a PMG system from scratch never-mind getting it to work properly and then monitoring the system.
Why implement Proxmox Mail Gateway?
Do you manage a single domain and love the simple life? Are you this person and mistakenly in charge of IT stuff? Good for you, no need to install PMG – Nothing to see here – move on, don’t comment either.
However, in most cases mail needs to be distributed internally to multiple domains on multiple platforms and using PMG simplifies this. For us this is the primary use case, relaying mail downstream to multiple servers, securely. PMG is a great drop in replacement / addition to ScrollOutF1. If you know, you know.
In a typical larger architecture you will have a single MX record that points to a port on your local edge router that delivers all incoming SMTP mail for all domains to a single PMG cluster in the perimeter network, formally known as the DMZ. Your backup MX could point to a second PMG cluster elsewhere on the internet. The same configuration is of course possible using Microsoft Exchange but there are costs to consider and MS Exchange does far more than just a bridgehead / edge transport server function in the perimeter network but at the same time do not dismiss the power of Sendmail and Postfix of course. That said, finding a locally installed Microsoft Exchange environment is becoming very low as most implementations are on O365 and oh boy, that is a whole separate career path.
PMG can be seen, in a way, as a shell for Postfix / Sendmail and it does deliver a lot of functionality that is extremely useful. One major annoyance is no support for Authenticated SMTP TLS sessions via the GUI as that is not what it does, it is not the MTA. You will have to dive down into the command line to configure SASL and TLS inside Postfix. We will provide some helpful hints for you to follow but as always, in the wise words of the NotesSensei YMMV – Your Milage May Vary.
Once PMG accepts the mail it will go through a process to scan the mail and use white lists and black lists and then deliver the mail to the appropriate next hop SMTP server. This is a great way of holding mail if a downstream server is offline due to a misconfiguration or other issue. Once the server is back the queue will be processed or you could simple flush the queue to route mail immediately.
Here are the most important settings (for AmazonSES):
relayhost = email-smtp.somewhere-1.amazonaws.com:587
smtp_sasl_auth_enable = yes
smtp_sasl_security_options = noanonymous
smtp_sasl_password_maps = hash:/etc/postfix/sasl_passwd
smtp_use_tls = yes
smtp_tls_security_level = may
smtp_tls_note_starttls_offer = yes
smtp_sender_dependent_authentication = yes
smtp_tls_policy_maps = hash:/etc/postfix/smtp_tls_policy
smtp_sasl_mechanism_filter = login

And for Brevo:

relayhost = smtp-relay.sendinblue.com:587
smtp_sasl_auth_enable = yes
smtp_sasl_security_options = noanonymous
smtp_sasl_password_maps = hash:/etc/postfix/smtp_auth
smtp_use_tls = yes
smtp_tls_security_level = may
smtp_sasl_password_maps = hash:/etc/postfix/relay_passwd
smtp_sasl_password_maps = static:smtpuser:passwordnf7wME8Qc]
header_size_limit = 4096000
smtp_sasl_auth_enable = yes
If you are familiar with this and know how to get this far you are good to go and congratulations. For the rest of us this is rather complex. This is not an install guide for Proxmox PVE or how to install Proxmox Mail Gateway. If that is your expectation then please RTFM and use Let Me Google That For You.
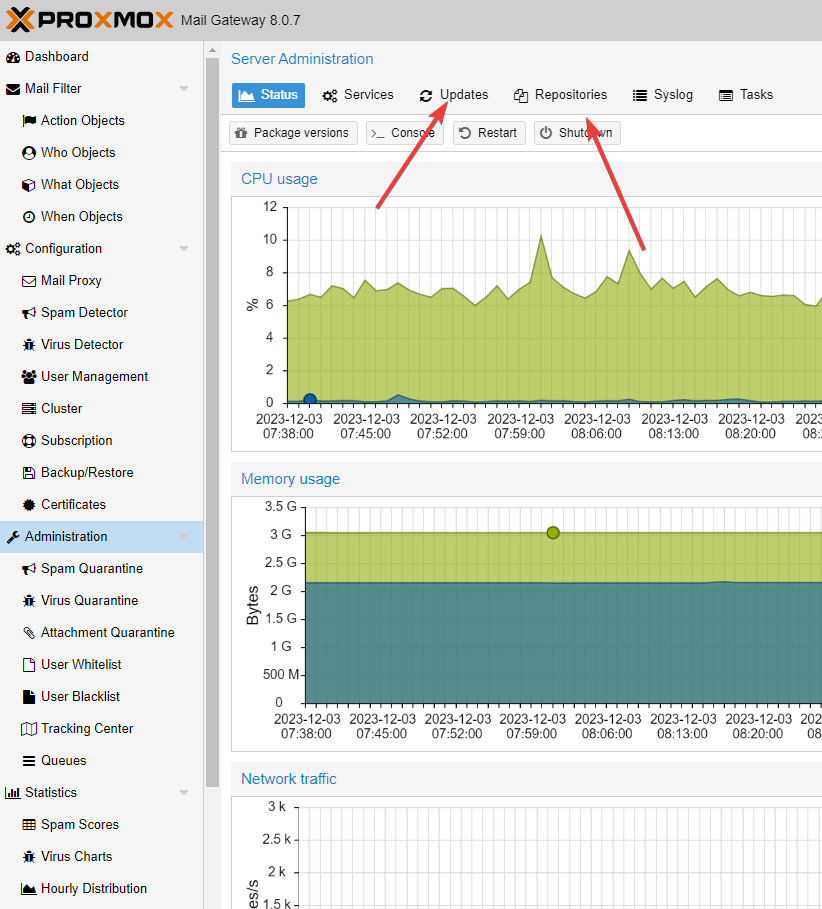
Step 1. Update your system and restart if appropriate
You can purchase a subscription and have access to pmg-enterprise repositories. If not you can enable the pmg-no-subscription libraries and disable pmg-enterprise.
Supporting companies that do not belong to handful of shameful industrialists is a good thing. As Elon Musk so eloquently said:- GFY
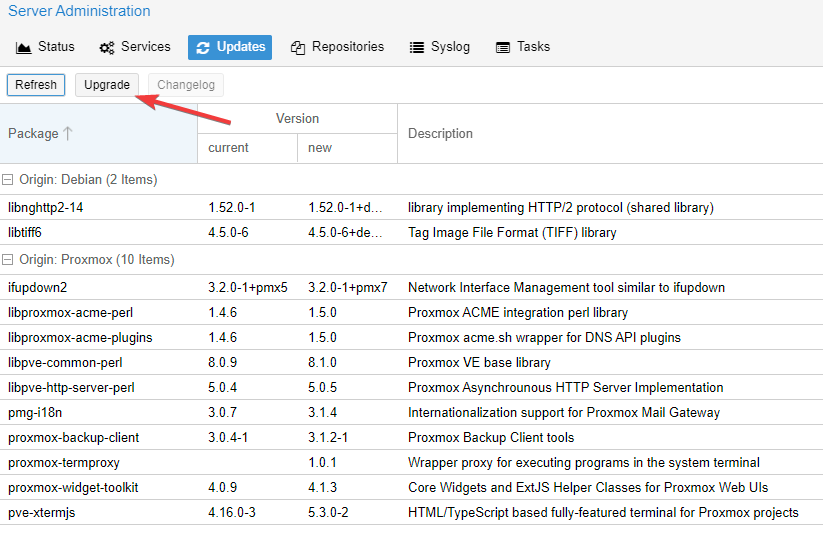
This will open a terminal session and install the updates.
Starting system upgrade: apt-get dist-upgrade
Reading package lists... Done
Building dependency tree... Done
Reading state information... Done
Calculating upgrade... Done
The following NEW packages will be installed:
  proxmox-termproxy
The following packages will be upgraded:
  ifupdown2 libnghttp2-14
...
Get:11 http://download.proxmox.com/debian/pmg bookworm/pmg-no-subscription amd64 proxmox-termproxy amd64 1.0.1 [377 kB]
Get:12 http://download.proxmox.com/debian/pmg bookworm/pmg-no-subscription amd64 proxmox-widget-toolkit all 4.1.3 [210 kB]
Fetched 5033 kB in 3s (2009 kB/s)
...
Setting up libpve-common-perl (8.1.0) ...
Setting up libpve-http-server-perl (5.0.5) ...
Processing triggers for libc-bin (2.36-9+deb12u3) ...
Processing triggers for pmg-api (8.0.7) ...

Your System is up-to-date
Running the command in a CLI - useful for automation via Red Hat Ansible
apt update
apt dist-upgradeStep 2. Check your configuration
- Check your Time zone and Server time. The server time is automatic based on the TZ.
- Check your DNS setting especially the search domain.
- Check your interfaces. Do you have IPV6 configured? Why not?
Next check the Options Tab
- Send daily admin reports.
- Use advanced stats.
- Stats life time is 7.
- Enter your admin email id.
Step 3. Mail Proxy config. The main configuration.
The configuration is written to – /etc/pmg/pmg.conf – Edit directly with great care.
Side Note: Use NSlookup to ensure your hostname can be resolved.
nslookup pxmxmailgw.mydomain.com – nslookup -q=mx pxmxmailgw.mydomain.com
Tab 1. Relaying
- Default Relay – You host name goes in here and make sure it can be resolved. Use NSlookup. – Do not use 127.0.0.1 and disable MX Lookup otherwise Postfix relay mail to itself.
- Relay port – This is the port the server answers on. As we have many downstream services that may not be able to switch away from port 25 we use port 25. This is a network preference.
- Relay protocol – smtp (Local Mail Transfer Protocol – LMTP is from 1996)
- Disable MX lookup (SMTP) – Leave it on – Here is the answer from the PM team – instead of a dedicated hostname (hostname.domain.com), you could also only enter a domain.com and use their MX records. That would help if you have primary and secondary or any other failover concept to be able to use more than one destination host.
- Smarthost – An email appliance like a barracuda / Spam Titan / Proof point / etc on the network where all traffic will be sent to as a next hop.
Details are inside /etc/pmg/pmg.conf
Tab 2. Relay Domains
You can add all domains you accept mail for in here.
A list of relayed mail domains, that is, what destination domains this system will relay mail to. The system will reject incoming mails to other domains.
Details are inside /etc/pmg/domains and is hashed into /etc/pmg/domains.db
Tab 3. Ports
- External SMTP Port – 25
- Internal SMTP port – 26
We accept mail on port 25 on the DMZ and OpenWRT sends it to PMG on port 25. All downstream servers can access PMG on port 26. Be vary careful here this setting changes the behaviour of greylists etc.
Tab 4. Options
- Message Size – 10485760 – Default is 10 Megabytes (MB) – we 25MB – 26214400
- Reject Unknown Clients – No – Postfix=reject_unknown_client_hostname – Postfix SMTP relay and access control
- Reject Unknown Senders – Yes – Postfix=reject_unknown_sender_domain – Reject the request when Postfix is not the final destination for the sender address, and the MAIL FROM domain has 1) no DNS MX and no DNS A record, or 2) a malformed MX record such as a record with a zero-length MX hostname
- SMTP Helo checks – No – We set this to Yes – Postfix=smtpd_helo_restrictions
- DNSBL Sites – all.spamrats.com,cbl.abuseat.org,ix.dnsbl.manitu.net,rbl.dns-servicios.com,spam.spamrats.com,xbl.spamhaus.org,zen.spamhaus.org
- DNSBL Threshold – 2 All ok
- Verify Receivers – Yes (450) – Change this setting into 550 when you trust Postfix’s judgments. When verification takes too long the Postfix SMTP server defers the sender or recipient address with a 450 reply – postfix=reject_unknown_recipient_domain, reject_unverified_recipient, and unverified_recipient_reject_code
- Use Greylisting for IPV4 – Yes
- Netmask for Greylisting IPV4 – 24
- Use Greylisting for IPV6 – Yes
- Netmask for Greylisting for IPV6 – 64
- Use SPF – Yes – Enhancing Email Security: How to Enforce SPF Check on Proxmox Mail Gateway – DMARC Analyzer – MXToolbox
- Hide Internal Hosts – No – Now set to yes – Hide received header in outgoing mails
- Delay warning time (hours)
- Client Connection Count Limit- 50
- Client Connection Rate Limit
- Client Message Rate Limit
- SMTPD Banner – PMG – Greetings Professor Falken: Do you want to play a game?
- Send NDR on Blocked E-Mails – No – Set to Yes for now
- Before Queue Filtering – No – Roughly speaking the order of mail-flow and checks is as follows:
1) postscreen (dnsbl checks (GUI->Configuration->Mail Proxy->Options), and protocol checks)
2) policy checks (pmgpolicy – greylisting SPF checks on mail proxy level (GUI->Configuration->Mail Proxy->Options)
3) recipient verification (if enabled)
4) – mail is passed to pmg-smtp filter
5) Analysis by virusscanner and SpamAssassin
6) run of the rule-system
7) depending on the final rule -> mail gets blocked, accepted or quarantined
Install the SASL authentication modules for Postfix
apt install libsasl2-modulesplease post the logs from the pmgpolicy.service.
if in doubt always check the syslog or mail.log (/var/log/syslog, /var/log/mail.log)
pmgversion -v
 Previous Post