Installing a Proxmox 8.1.3 Lab server
Proxmox VE is an Open Source solution for running virtual devices including, virtual machines, containers and more. It is perfect and almost a necessity for lab environments but is powerful and robust enough for the most demanding production environment.
This quick post describes the primary steps to start a bare metal install.
The hardware used is a Dell Optiplex 7050 micro PC with 32GB of memory, one 2GB NVME disk and one 2GB SSD drive. They cost around $100.00.
Start by downloading the latest Proxmox VE ISO. To create the ISO on a bootable USB you can use Balena Etcher.
Once done ensure your server is connected to a monitor and has a keyboard attached. Use the text interface as opposed to the graphics interface as there is no real difference. Use ext4 for the disks for a simple life. If you have a monster machine with multiple disks and memory then consider ZFS but for a lab server use ext4.
Step 1. Set the repositories and update and restart.
- Disable both Enterprise repositories.
- Add the No-Subscription repositories
- Go to updates and press refresh.
- When the window says OK close the window
- Click on upgrade.
- Inside the new window enter y
- When complete close the window
- Reboot.
Step 2. Remove Local-LVM and increase space on Local.
- Configure and start a Putty session so you can copy and paste commands.
- Go to Data center and remove Local-lvm
- Run the commands below:
- Reboot and confirm.
lvremove /dev/pve/data
lvresize -l +100%FREE /dev/pve/root
resize2fs /dev/mapper/pve-root
Step 3. Edit logind.con
- nano /etc/systemd/logind.conf
- Use ignore for any setting that may cause unexpected shutdowns
Step 4. GPU passthru
- nano /etc/default/grub
- GRUB_CMDLINE_LINUX_DEFAULT=”quiet intel_iommu=on iommu=pt pcie_acs_override=downstream,multifunction nofb nomodeset video=vesafb:off,efifb:off”
- update-grub
- echo “vfio” >> /etc/modules
- echo “vfio_iommu_type1” >> /etc/modules
- echo “vfio_pci” >> /etc/modules
- echo “vfio_virqfd” >> /etc/modules
- echo “options vfio_iommu_type1 allow_unsafe_interrupts=1” > /etc/modprobe.d/iommu_unsafe_interrupts.conf
- echo “options kvm ignore_msrs=1” > /etc/modprobe.d/kvm.conf
- echo “blacklist radeon” >> /etc/modprobe.d/blacklist.conf
- echo “blacklist nouveau” >> /etc/modprobe.d/blacklist.conf
- echo “blacklist nvidia” >> /etc/modprobe.d/blacklist.conf
- echo “blacklist snd_hda_intel” >> /etc/modprobe.d/blacklist.conf
- echo “blacklist snd_hda_codec_hdmi” >> /etc/modprobe.d/blacklist.conf
- echo “blacklist i915” >> /etc/modprobe.d/blacklist.conf
- Find the vfio numbers
- echo “options vfio-pci ids=8086:1912,8086:a2f0, disable_vga=1”> /etc/modprobe.d/vfio.conf
- update-initramfs -u
*tip: Use this command for a before and after check to ensure IOMMU is active
for d in /sys/kernel/iommu_groups//devices/; do n=${d#/iommu_groups/}; n=${n%%/}; printf ‘IOMMU group %s ‘ “$n”; lspci -nns “${d##/}”; done
To find vfio:

lspci -v

Look for the first set of numbers
00:02.0 VGA compatible controller: Intel Corporation HD Graphics 530 (rev 06) (prog-if 00 [VGA controller])
00:1f.3 Audio device: Intel Corporation 200 Series PCH HD Audio

Use the numbers and run:-
lspci -n -s 00:02.0

00:02.0 0300: 8086:1912 (rev 06)

Run through all the PCI devices you want to passthru and add it this line:

echo "options vfio-pci ids=8086:1912,8086:a2f0 disable_vga=1"> /etc/modprobe.d/vfio.conf
Step 5. Add NFS and NFS Share and the second Disk
- Run lsblk
- wipe the second disk in the GUI
- Initialize disk with GPT
- fdisk /dev/sda
- n
- Default, default, +1600GB (1.5 TiB
- 2, default, default (372.9 GiB)
- w
- lsblk
- mkfs -t ext4 /dev/sda1
- mkfs -t ext4 /dev/sda2
- mkdir /mnt/pve/lrssd15tib
- mkdir /mnt/pve/lrssdnfs
- mount -t auto /dev/sda1 /mnt/pve/lrssd15tib
- mount -t auto /dev/sda2 /mnt/pve/lrssdnfs
- apt install nfs-server
- chmod -R 777 /mnt/pve/lrssd15tib
- chmod -R 777 /mnt/pve/lrssdnfs
- Go to the GUI, Datacenter and add a directory
- lrssd15tib – /mnt/pve/lrssd15tib – Disk Image, ISO Image, container template, VZdump, Snippits – not shared
- lrssdnfs – /mnt/pve/lrssdnfs – Disk Image, ISO Image, container template, VZdump, Snippits – shared
- The new disk is now in the GUI.
- Next export the NFS volume for other systems to find.
- nano /etc/exports
- Add – /mnt/pve/lrssdnfs *(rw,async)
- systemctl restart nfs-server
- Connect to a remote NFS drive
- tp16nfs – 172.22.*.* (should be in drop down) – select all
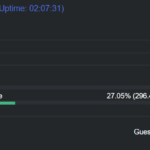
Step 6. Add Netdata
bash <(curl -Ss https://my-netdata.io/kickstart.sh)
http://172.22.*.*:19999/
Step 7. Add system Notes
For example:
To reduce memory from 98% to 46% when using ZFS:
```
echo "$[3 * 1024*1024*1024]" >/sys/module/zfs/parameters/zfs_arc_max
cat /sys/module/zfs/parameters/zfs_arc_max 3221225472
```
Reboot.
Step 7. Migrate VM’s
- Shutdown the VM using – shutdown -h now
- Go to Backup – Backup now – Choose NFS share on target – Mode = Stop.
- Restore using the same node ID
 Next Post